Part 2: Connecting Raspberry Pi's to DigitalOcean with ZeroTier
In part 2 of getting everything up and going, we’ll be covering Turing Pi prep with multiple nodes, creating a Droplet in Digital Ocean, creating your ZeroTier network, joining your DO droplet to the ZeroTier network as a client, and the requirements and setup for a system in your homelab acting as a router for ZeroTier.
Local Hardware Requirements
- Router for your Lab/Home which can have static routes set
- Laptop/Desktop running Mac/Windows/Linux to program your Pi’s with
- 1 System to act as the ZeroTier router
- 1 Turing Pi
- 1 Micro USB to USB Type A (or Type C, if you’re system has it)
- 2+ Systems to act as k3s nodes
Assumptions
For the purpose of this guide, I’m going to assume the following things:
- You have an existing DHCP server, and you’re able to get the IP addresses of each of the Pi nodes we’ll be adding.
- You have an existing Digital Ocean account, or use this link to get $100 in free credit with a new account.
- You have the capability to follow instructions and add your own SSH key.
- I’ll also get $25 for free, so that’s pretty great.
- You have or can create a free account with ZeroTier (Link here).
- You know how to and have the capability to add static routes on your router to point to the ZeroTier network.
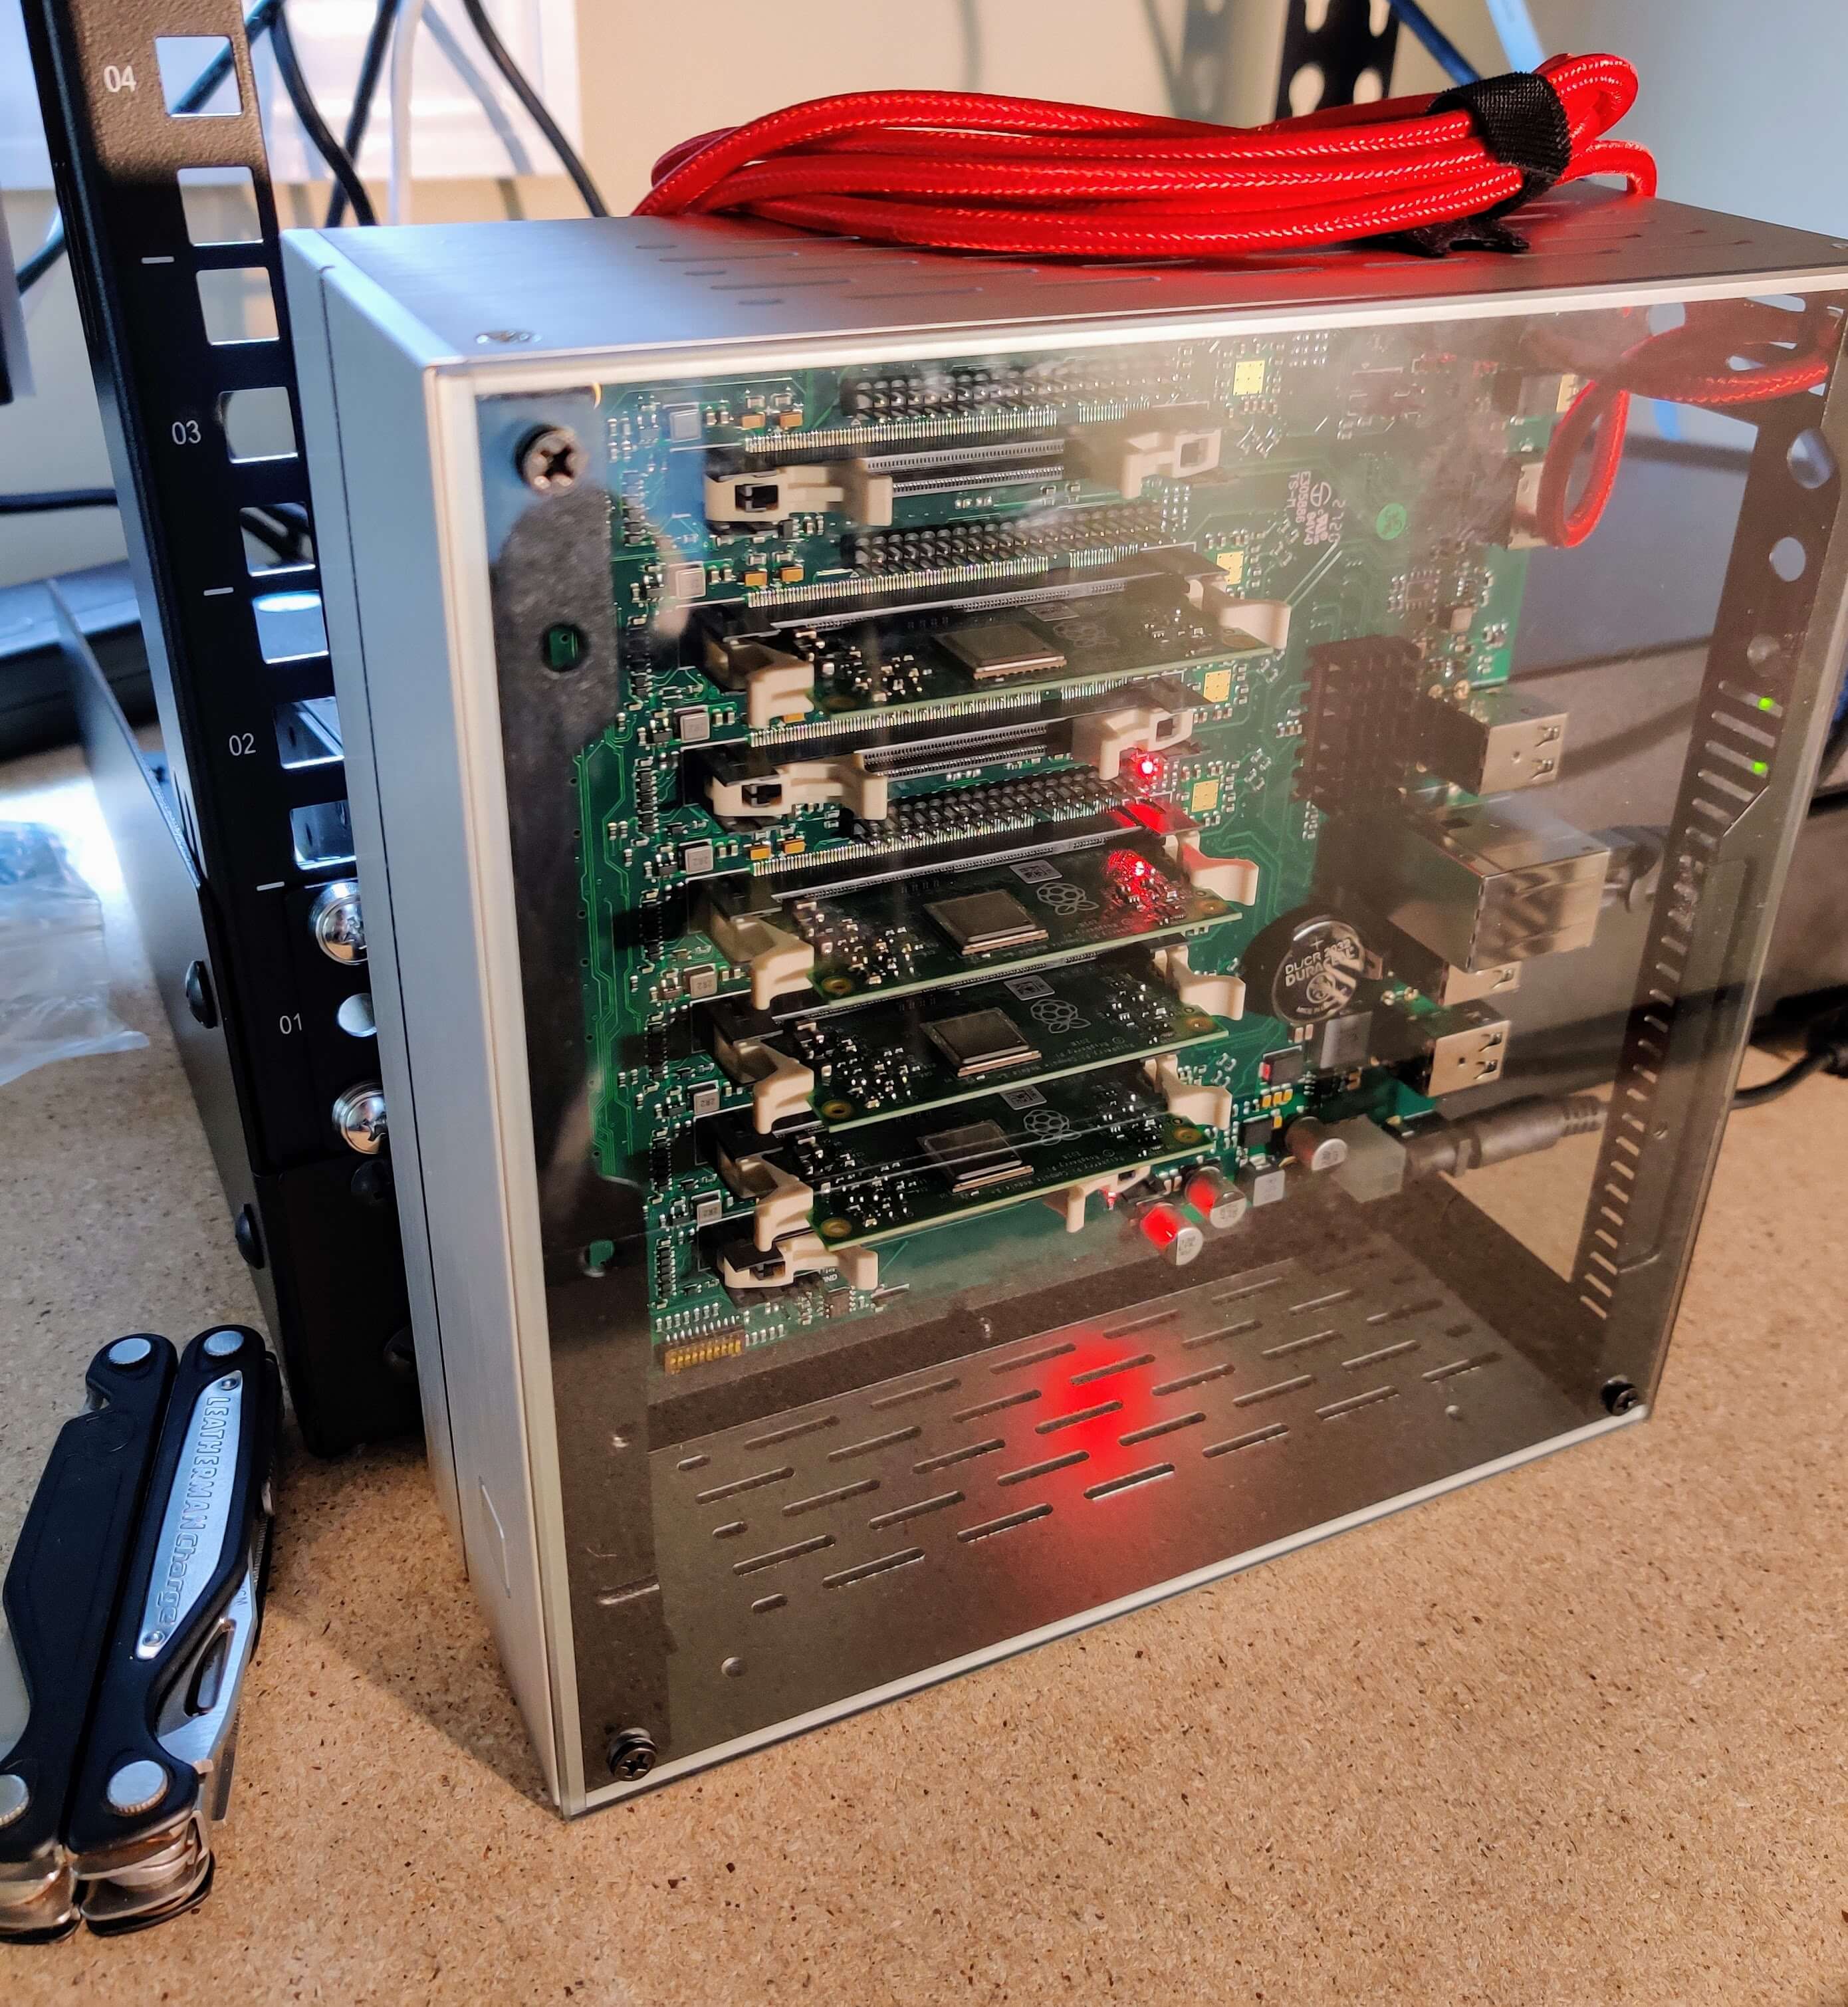
Building the Pi Cluster
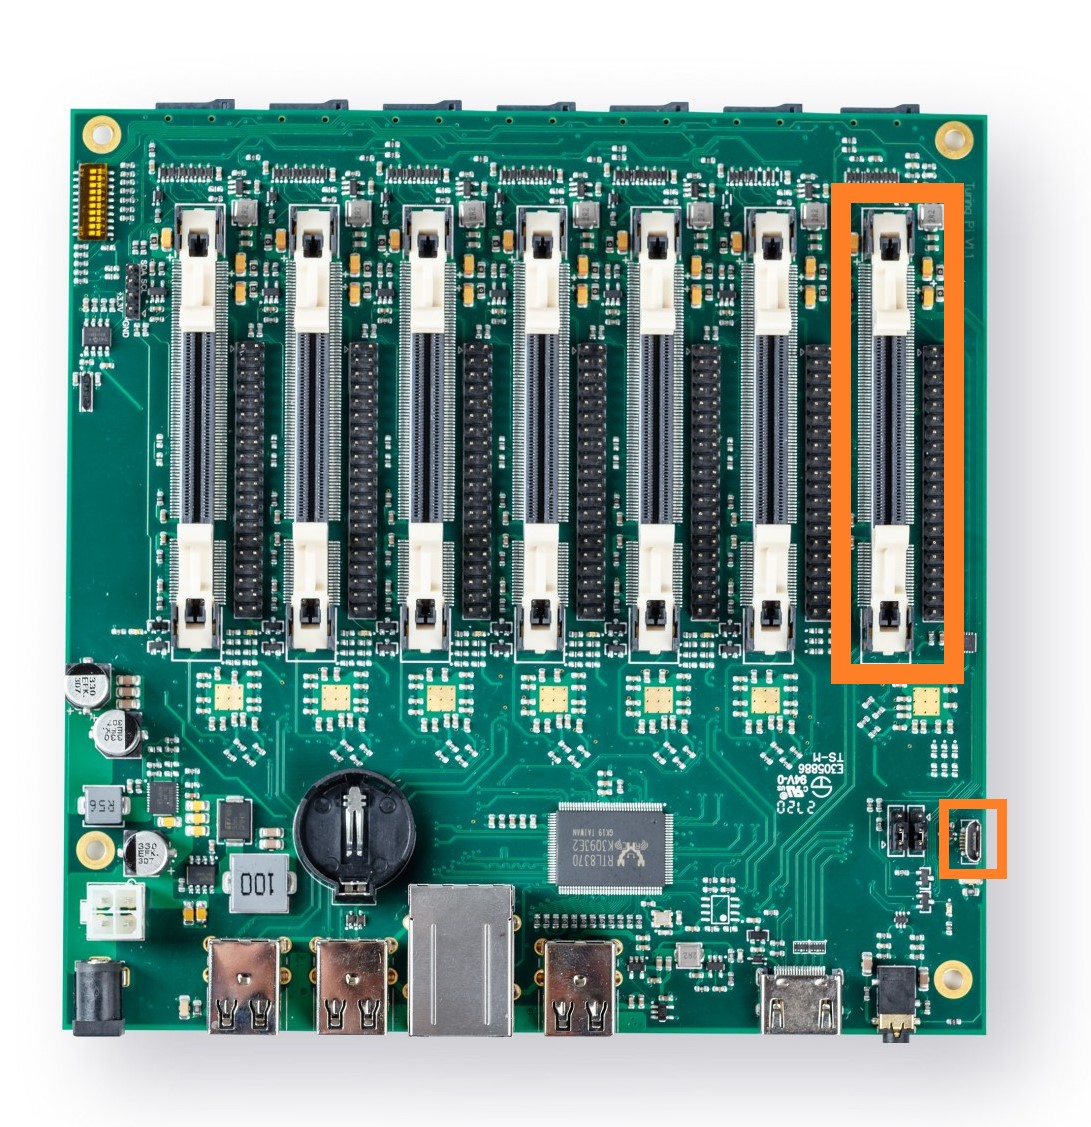
The Turing Pi has seven slots on the board for Raspberry Pi Compute Modules which slot into the DDR2-SODIMM slots. If you’re looking at the top-down view below, you’ll see the right-most (top) port has an orange box. Assuming that you are running the RPi CM3+ units with on-board eMMC storage, this is the slot that you’ll use to program each of the nodes. The smaller orange box is where you’ll need to connect a MicroUSB cable to.
You’ll need to ensure that you have the usbboot tools installed on your system. Instructions for getting it installed on your system are conveniently available on the Raspberry Pi website.
Prepping the Pi’s with HypriotOS
Once you’ve connected your first node, go ahead and download BalenaEtcher and HypriotOS. We’ll be using BalenaEtcher to flash HypriotOS to each of the Pi nodes. As of writing this, I downloaded and progressed with HypriotOS v1.12.3.
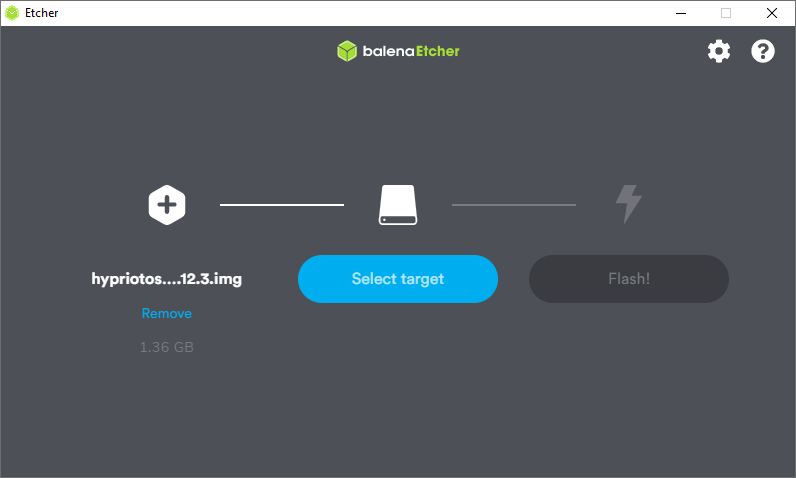
Once you have downloaded, installed, and have run BalenaEtcher, simply select the HypriotOS download and the Raspberry Pi node that will show up and click “Flash!”
After the node has been successfully flashed, you can move the node to another slot on the board and repeat this process for each of your Pi nodes.
After all of your nodes have been flashed, add your SSH key, run ssh-copy-id pirate@$ipAddress. You can then SSH to each node with the username pirate and set the hostnames by running the following commands:
sudo hostnamectl set-hostname $NEW_HOSTNAME
sudo sed -i 's/preserve_hostname: false/preserve_hostname: true/g' /etc/cloud/cloud.cfg
sudo systemctl reboot
Alternatively, if you want a “one-liner”, you can instead run:
ssh pirate@$ipAddress -t "sudo hostnamectl set-hostname $NEW_HOSTNAME && sudo sed -i 's/preserve_hostname: false/preserve_hostname: true/g' /etc/cloud/cloud.cfg && sudo systemctl reboot"
Spinning up the Digital Ocean Droplet
In the Digital Ocean console, go ahead and create a new Droplet.
Creating Droplet - Part 1
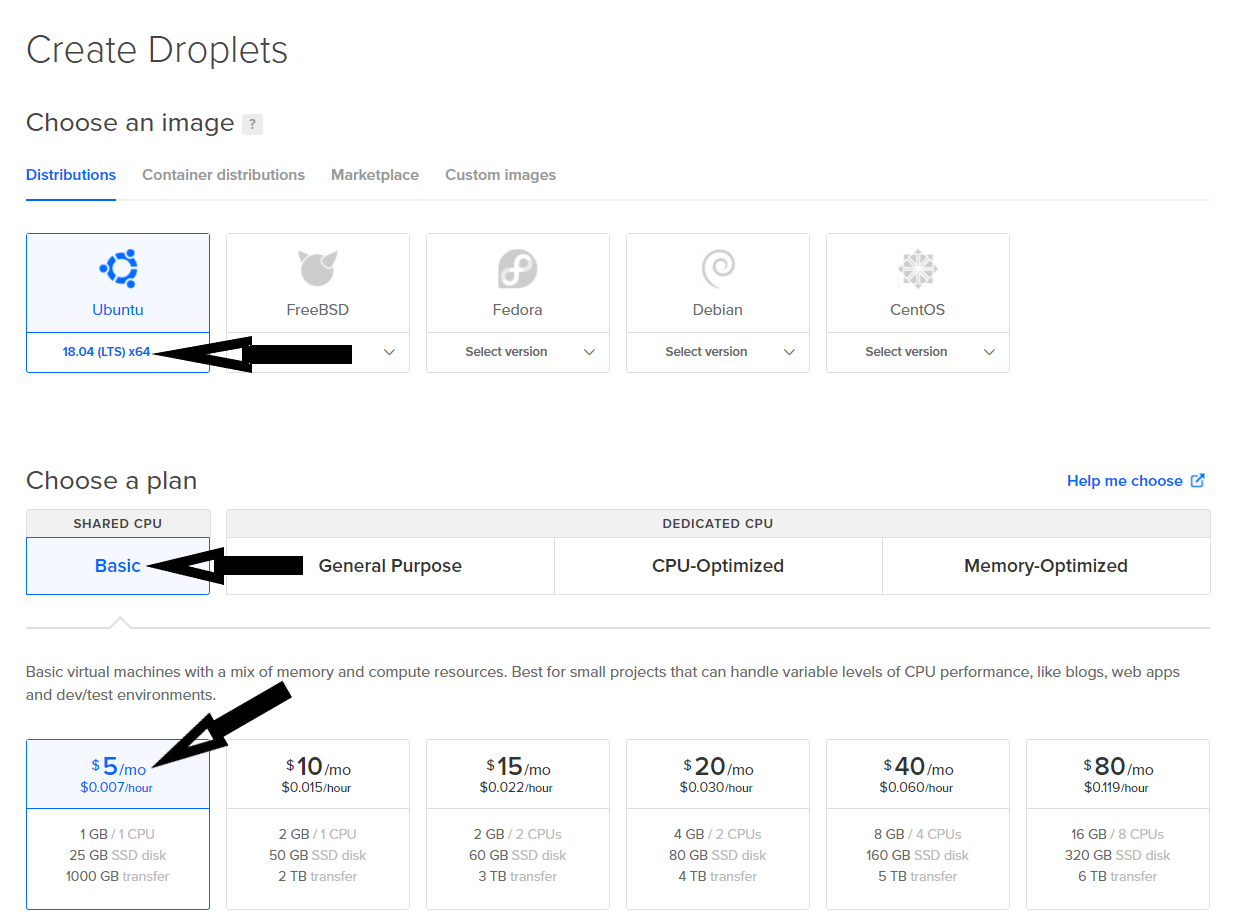
- For the Distribution, select Ubuntu 18.04 (LTS).
- 20.04 may work just fine, but I have not tested it.
- For the plan, choose Basic.
- Select the $5/mo virtual machine.
Creating Droplet - Part 2
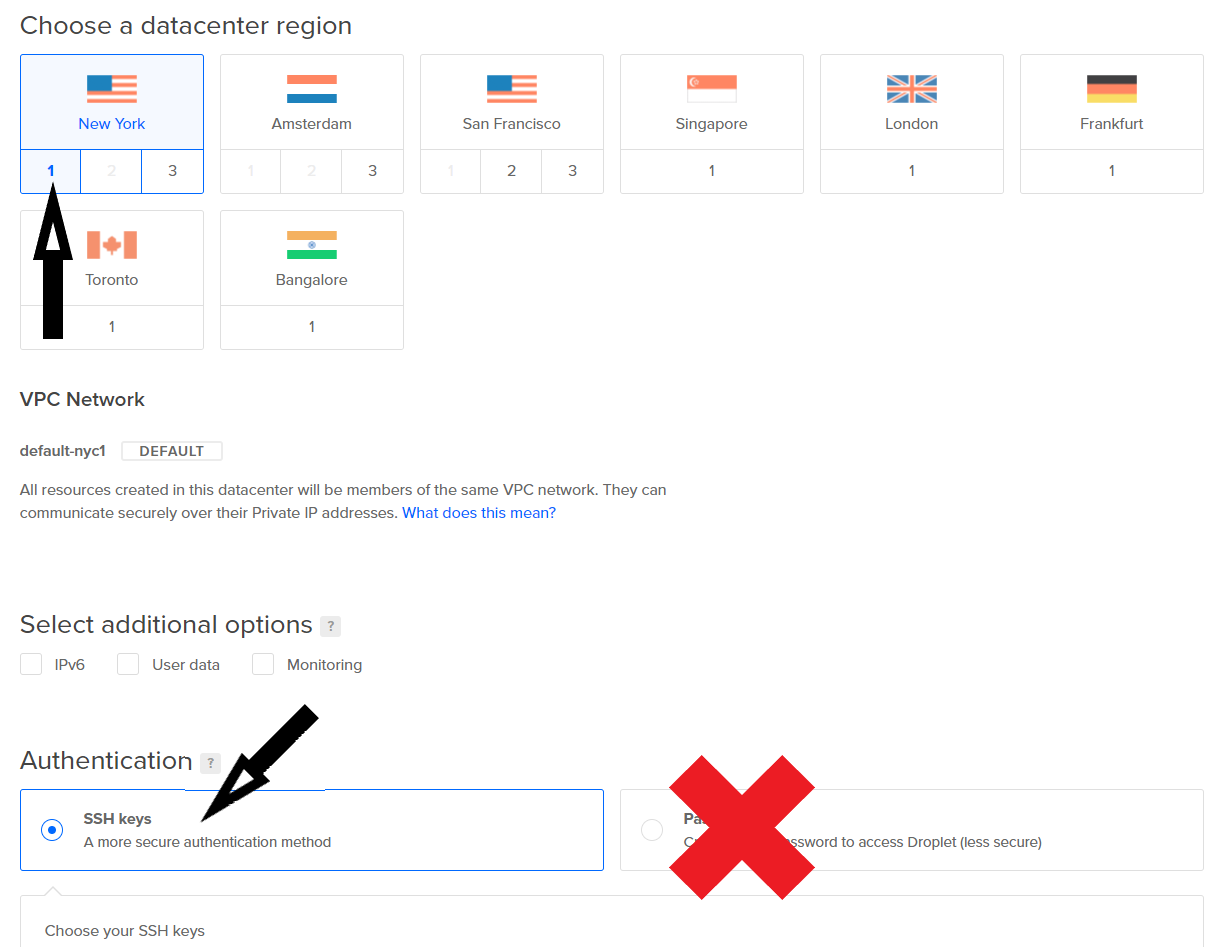
- For the datacenter region, I’ve selected New York 1. You should select whichever region makes the most sense for where you are located.
- For Authentication, select SSH keys and make sure to select/add your public key.
- DO NOT select password auth. It’s bad. Don’t do it.
Creating Droplet - Part 3
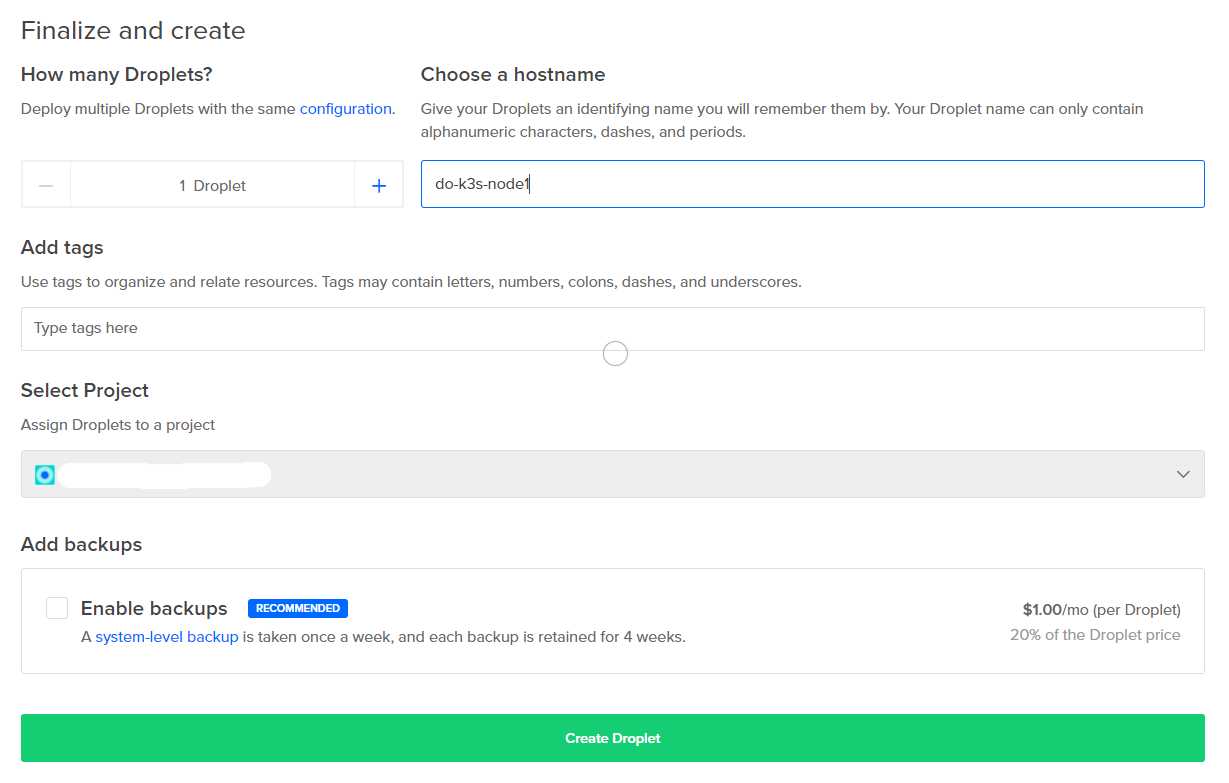
- For the number of droplets, leave this at 1 Droplet
- Enter the hostname you wish to set the VM to. For me, I have gone with
do-k3s-node1
Once that’s all complete, click “Create Droplet.”
We’ll come back to this in a few minutes.
ZeroTier
Navigate to the the ZeroTier Network page, log in, and click Create a Network. Click on the newly created ID and ensure that the Access Control settings are set to Private. You may also want to set a real name for this network instead of the random words it creates initially. Make a note of the newly created ID, but for simplicity sake let’s pretend that it’s ba0348ec2d6679b4.
That’s it for the moment, but we’ll be right back in a few minutes.
Associating the DO Droplet
Let’s navigate back to the Digital Ocean droplet in the Digital Ocean console. Copy its public IP and SSH to it (Username: root). We’re going to run the following commands:
curl -s https://install.zerotier.com | sudo bash
zerotier-cli join ba0348ec2d6679b4
Back on the ZeroTier Network page, scroll down to Members and you should see a new client. This is your Digital Ocean droplet! Click the checkbox under Auth? and you should be good to go. Similarly to above, you may want to set a human-readable name.
Creating a ZeroTier ‘Router’ in the Homelab
I’m going to assume that the host you’ll be setting things up on is a Debian base. Here are roughly what the commands (and output) will look like
# Install ZeroTier and join to the previous network
curl -s https://install.zerotier.com | sudo bash
sudo zerotier-cli join ba0348ec2d6679b4

# Ensure that we can forward packets between interfaces
sudo sysctl net.ipv4.ip_forward=1
sudo sed -i 's/#net.ipv4.ip_forward=1/net.ipv4.ip_forward=1/g' /etc/sysctl.conf

# Set up iptables rules
ip link | awk -F: '$0 !~ "lo|vir|wl|^[^0-9]"{print $2;getline}'
# eth0        <== This is our physical ethernet
# ztyou2j6dw  <==This is our ZeroTier Virtual Adapter
PHY_IFACE="eth0"
ZT_IFACE="$(ip l | grep 'zt' | awk '{print substr($2,1,length($2)-1)}')" # <== This command will grab your ZeroTier interface name
sudo iptables -t nat -A POSTROUTING -o $PHY_IFACE -j MASQUERADE
sudo iptables -A FORWARD -i $PHY_IFACE -o $ZT_IFACE -m state --state RELATED,ESTABLISHED -j ACCEPT
sudo iptables -A FORWARD -i $ZT_IFACE -o $PHY_IFACE -j ACCEPT

# Make sure the rules are persistent after reboot/poweroff
sudo apt install iptables-persistent
sudo bash -c iptables-save > /etc/iptables/rules.v4

# Ensure that ZeroTier always comes back up after a reboot
sudo systemctl enable zerotier-one
Once that’s all complete, navigate back to the network page in ZeroTier. Once again, scroll down to Members and you should see a new client. This is the ‘ZeroTier Router’ we’re building now! Click the checkbox under Auth? and set a human-readable name.
Next, copy the Managed IP and scroll back up to Advanced > Managed Routes. Under Add Routes, set the destination for the subnet of the eth0 interface from above, and (via) to the Managed IP from below. This will allow your Digital Ocean droplet to communicate to the Pi’s on your network.
Note the subnet chosen below, we’ll need this for your home router. On your home router, you will need to add a static route with the Destination Address of your ZeroTier Network subnet (172.22.0.0/16, for example), and a Gateway of the eth0 interface from above.
Once all this is complete, we should be good to proceed.
Validating Network Connectivity between local Pi’s and the DO Node
SSH back to your Digital Ocean droplet and run a ping against the LAN address of your home. If everything above is set correctly, you’ll be able to successfully hit it.
root@do-k3s-node1:~# ping -c1 10.45.0.1
PING 10.45.0.1 (10.45.0.1) 56(84) bytes of data.
64 bytes from 10.45.0.1: icmp_seq=1 ttl=63 time=26.1 ms

--- 10.45.0.1 ping statistics ---
1 packets transmitted, 1 received, 0% packet loss, time 0ms
rtt min/avg/max/mdev = 26.150/26.150/26.150/0.000 ms
If you’re seeing a similar result, congratulations! We’ve successfully established a link between your droplet and your Homelab’s network!
What’s coming up
In part 3, I’ll be covering:
- Deploying K3s
- Deploying the K3s Main Node
- Deploying the K3s Pi Worker Nodes
- Deploying the K3s DO Worker Node
- Upgrading and Updating Traefik on K3s
- Using Lens to Update Traefik
- Creating a Digital Ocean API Token
- Updating the Traefik Deployment
- Associating a firewall with your DigitalOcean droplet
Helpful Links & References
- serverfault - How to get your ethernet interface names
- ZeroTier Docs - Route between ZeroTier and Physical Networks
Questions? Thoughts?
Feel free to ping me at daniel.a.manners@gmail.com. If something I wrote isn’t clear, feel free to ask me a question or tell me to update it!