Gitlab-CE, Azure Active Directory, and OAuth2
Configuring Gitlab for Azure Directory OAuth
This is a quick how-to guide on getting Gitlab-CE up and going and how to configure Azure Active Directory (AAD) to work with Gitlab-CE. At the end of this guide, you should be able to
Requirements
The only requirements to complete this guide are as follows:
- Azure Portal Admin Access
- Gitlab Server
- 4GB+ of Memory
- 32GB of storage (or more)
- If this server will be accessed over the internet, make sure that TCP/22, TCP/80, and TCP/443 are available over the internet.
- Make sure this requirement is met AFTER the server has been configured. If you do this before, anyone on the open internet could theoretically set your root user password instead of you!
Step 1 - Install Gitlab-CE
Follow the steps at https://about.gitlab.com/install/ to install Gitlab-CE on your server.
Make sure that you install Gitlab-CE not Gitlab-EE. The instructions should be the same, but replace EE with CE.
For Ubuntu 16.04+, the steps will look something like this:
$ sudo apt-get update
$ sudo apt-get install -y curl openssh-server ca-certificates
$ curl https://packages.gitlab.com/install/repositories/gitlab/gitlab-ce/script.deb.sh | sudo bash
$ sudo EXTERNAL_URL="http://gitlab.danmanners.dev" apt-get install gitlab-ce
Once this is completed, you’ll need to navigate to http://gitlab.danmanners.dev or http://internal.ip.address and set the root account password.
Step 2 - Configure Azure Active Directory
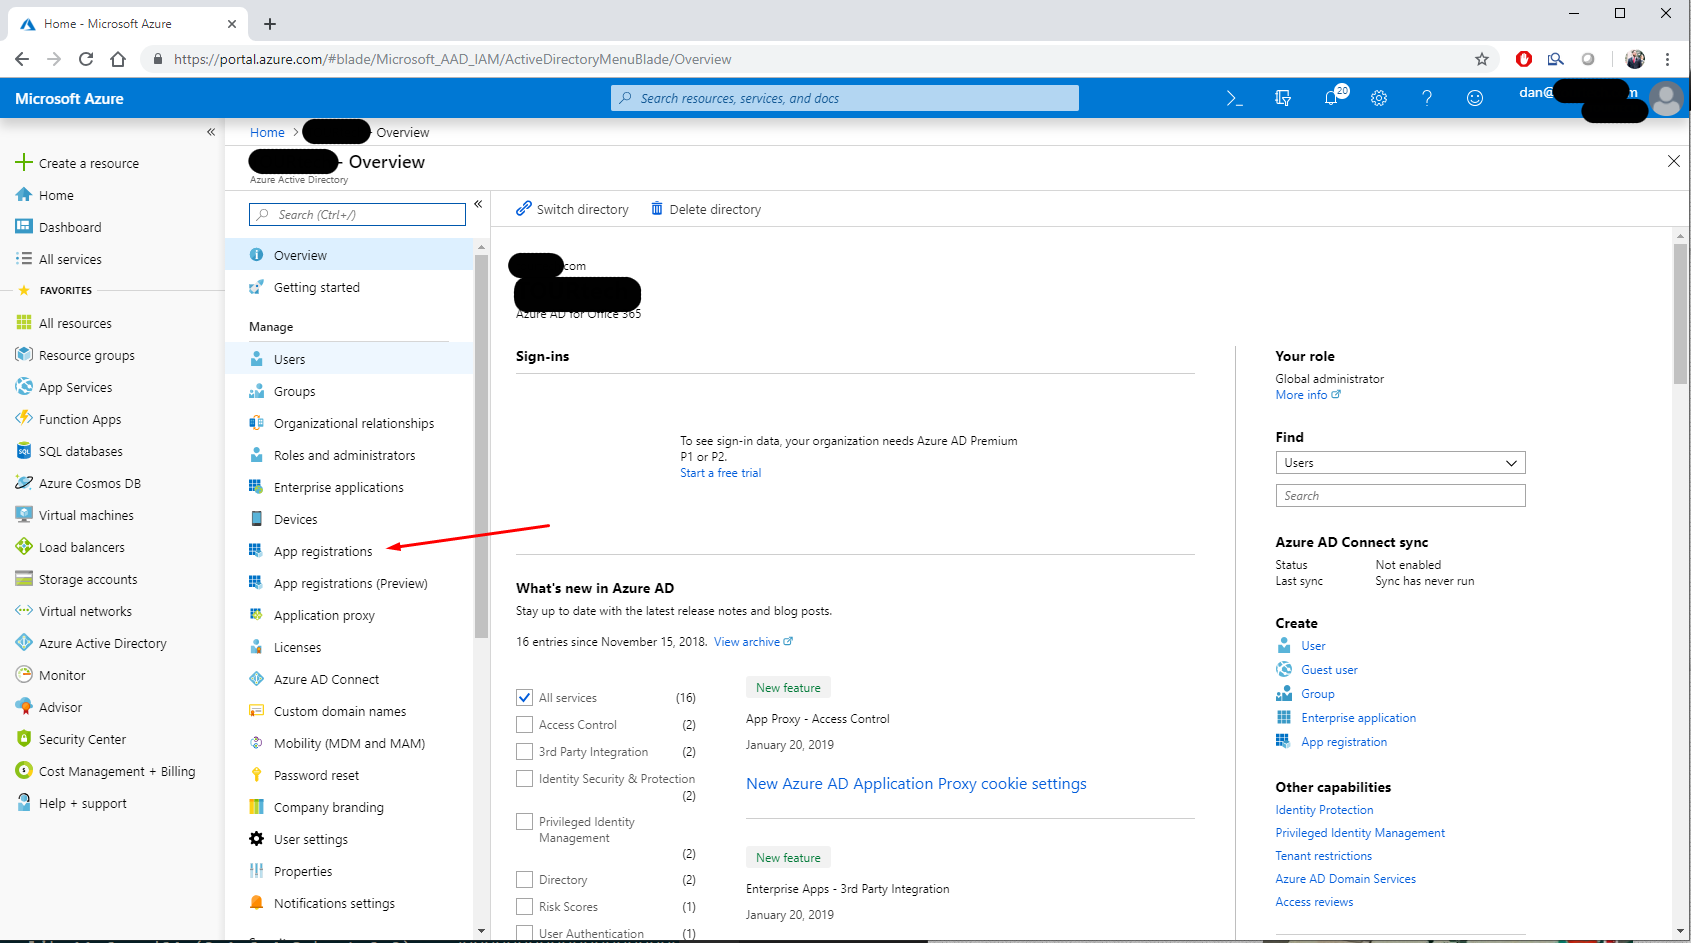
- Log into https://portal.azure.com with your Azure admin account and navigate to Azure Active Directory.

- Navigate to App registrations.
- Click on “New application registration”

- Fill out the form similar to this and click create.

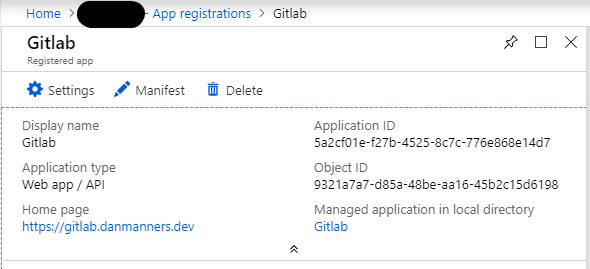
- Click on the item you’ve just created and note the
Application IDUUID, as we’ll need this later as$APPLICATION_ID. Then click on Settings.
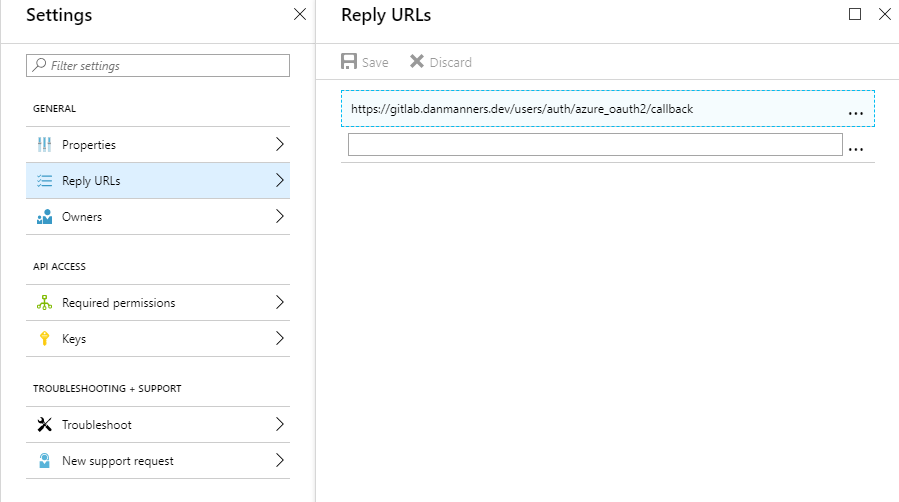
- Navigate to
Reply URLsand make sure you set the default as the following:https://$GITLAB_URL/users/auth/azure_oauth2/callback
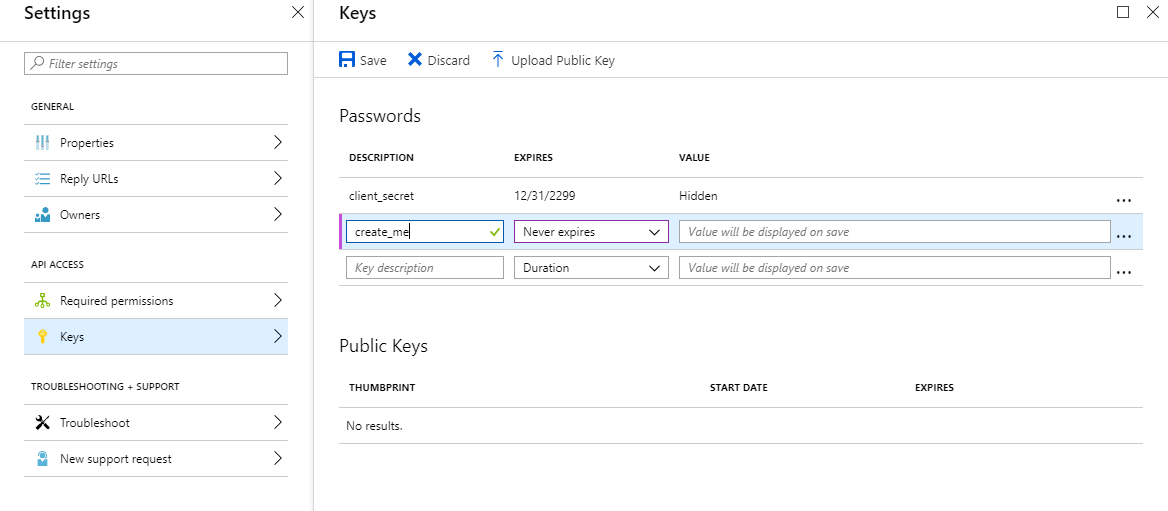
- Navigate to
Keysand create a password called client_secret with an expiration date of Never expires. Once you click Save at the top, it will give you the password. Make sure to copy this, as once you navigate away it will never be recoverable and you will need to delete the previous token and re-do this step. We’ll need this later as$CLIENT_SECRET.

- Backing out of the App Registrations, navigate to Endpoints. From there, you’ll want to select and copy the last item. Grab the UUID after
https://login.microsoftonline.com/. This will be used as$TENANT_IDbelow.

Step 3 - Configure the Omnibus
SSH to the Gitlab-CE server and open /etc/gitlab/gitlab.rb as root. We’re going to make the file look something like this:
# External URL
external_url 'https://gitlab.danmanners.dev'

# OAuth Config
gitlab_rails['omniauth_enabled'] = true
gitlab_rails['omniauth_allow_single_sign_on'] = ['azure_oauth2']
gitlab_rails['omniauth_sync_email_from_provider'] = 'azure_oauth2'
gitlab_rails['omniauth_sync_profile_from_provider'] = ['azure_oauth2']
gitlab_rails['omniauth_sync_profile_attributes'] = ['name','email']
gitlab_rails['omniauth_block_auto_created_users'] = false
gitlab_rails['omniauth_auto_link_ldap_user'] = true
gitlab_rails['omniauth_external_providers'] = ['azure_oauth2']
gitlab_rails['omniauth_providers'] = [
  {
    "name" => "azure_oauth2",
    "args" => {
      "client_id" => "$CLIENT_ID",
      "client_secret" => "$CLIENT_SECRET",
      "tenant_id" => "$TENANT_ID",
    }
  }
]

# Let's Encrypt Public Facing Certificate
letsencrypt['enable'] = true
letsencrypt['contact_emails'] = ["dan@danmanners.com"] # This should be an array of email addresses to add as contacts
letsencrypt['auto_renew'] = true
letsencrypt['auto_renew_hour'] = 0
letsencrypt['auto_renew_day_of_month'] = "*/4"
Make sure that you replace the three variables in the omniauth_providers block with the values we’ve noted above from Step 2.
Step 4 - Reconfigure Gitlab
Run the following command as root on the Gitlab server:
$ gitlab-ctl reconfigure
This will kick off a number of tasks. At the end of this, you should be able to click on the OAuth login